Tip of the Day | Keep your carpet dry!

Do you want to keep that nice, expensive carpet dry? Or maybe you have a nice hardwood floor that you don’t want to get water spots all over? We’ve got the aquarium tip for you! Place an impenetrable barrier between your tank stand and the flooring that it will be on.

There are several options that you can choose from to accomplish this. If you want to keep it cheap, you can just buy a $5 tarp from your local hardware store and put it under your tank. However, your spouse might not like this option and it may detract from the overall beauty of your aquarium. Or, maybe that tarp can be rolled up and hidden under your tank stand when you’re not doing maintenance on your aquarium. If not, there are other options that are just a little more expensive.

If you want something that is a little more esthetically pleasing you can search a little more in your local hardware store and find impenetrable, vinyl, comfort mats in all sorts of shapes, sizes, and colors. These range in price from $30 to $200 depending on what you want and the size that need for your aquarium tank stand.  Just make sure that you have a barrier that sticks out from the edges of your tank stand by a few inches on all sides. After all, water splashes are not picky!

How do you protect from erroneous water splashes during maintenance of your aquarium? Leave a comment!

TJ

Comments { 0 }

Tip of the Day | Use a Timer for your Aquarium Lighting

You want to know one of our top five aquarium tips for relaxation and enjoyment of your home aquarium? Do you want the aquarium tip that will get rid of two daily chores throughout every day of your aquarium owning life? That’s right! Go out, and buy an inexpensive timer from your local hardware store, plug your aquarium lights into it, set it for the correct times, and whoa-la!

You just saved yourself from having to remember to turn the lights on at the beginning of the day, and turn the lights off at the end of the day. You also just shed some stress of worrying about if your fish, plants, and corals are getting the correct amount of light. No more worries about forgetting to turn the lights on when you rushed out the door late for work in the morning. No more rushing home from a nice night out with your family or some drinks at the bar to make sure you turn your aquarium lights off.

How long should your lights be on? Typically, anywhere from 8 to 12 hours a day will be adequate for most home aquariums. Is there any particular time of day that the aquarium lights should be turned on or off? Not necessarily. As long as there is a regular schedule of the lights going on about the same time every day and off around the same time every day your fish, plants, and corals should stay happy and stress free. Personally, I keep my light on for 10 hours a day and I like to make sure that I can enjoy my aquarium after work. Therefore, I don’t like to turn my lights on at 8am and off at 6pm because I might not even be home during those hours. My lights are set to come on at noon and turn off at 10pm. They do this every day, and the residents of my aquarium seem fairly happy.

Make sure you understand what you’re keeping in your aquarium and you know what the lighting requirements are for your aquarium’s residents. Adjust the timer for your lighting accordingly, put your feet up, and enjoy!

How do you time your aquarium lighting? Leave a comment!

TJ

Comments { 0 }

Video of Peppermint Angelfish in Natural Environment

We here at Aquarium Tip Tank recently heard of a peppermint angelfish (Paracentropyge boylei) finding a new home, at least for a little while, at the Waikiki Aquarium. This in itself is special news because it is one of the rarest fish to be kept in a marine aquarium. This one that recently arrived at the Waikiki Aquarium is only the second Paracentropyge boylei to be kept in an aquarium…ever. The only other one that is known to be alive in captivity is kept by a Japanese aquarist.

The peppermint angelfish is also very difficult to obtain because its natural habitat is at 35o ft. below the surface. It is also extremely difficult to get a video of this specimen in its natural environment. It shows up at about 2:41 into this video in the top, middle section of the frame, swimming out and between the rock crevices. This video was shot by Dave Pence at a depth of 350 ft. while on a dive near the island of Moorea. The peppermint angelfish that is currently at the Waikiki Aquarium was caught at 365 ft.  by Rich Pyle on this same dive. The rebreather equipment you see the SCUBA divers using is what allowed the divers to go so deep for such a long dive.

The specimen currently at the Waikiki Aquarium is reportedly happily adjusting to its temporary quarantine tank, but will eventually be transported over to the Smithsonian as part of the Moorea Biocode project.

TJ

Comments { 0 }

Tip of the Day | Leak Check your Tank

Okay. So, you’ve cleaned out your tank and made sure that there is no more dust, dirt, grime, spider webs, etc. in your tank. It’s time to do a leak check! This isn’t something that takes too long, and it will save you a whole lot of stress and disappointment later on. Personally, I would do this with any tank, new or used. A new tank shouldn’t leak. It came with a warranty from your LFS right? Well, I’ll let you figure out how upset you would be if you put water in your new tank, went to bed, and woke up the next morning with a wet carpet and little to no water left in your aquarium.

So, first you need to find a location to perform this test. This should obviously be a place that is easily cleaned and mopped up if the tank does have a leak. Maybe this is a spare bathtub, or your basement, or your kitchen with a tarp under the tank. Find a good spot, and fill the tank up with water! RO/DI water is again preferred. After all, you don’t want all of that chlorine and minerals from your tap water to coat the inside walls of your tank. However, if tap water is all you have, it should end up being okay. You can go ahead and perform your leak test while your RO unit is being shipped to your house. That’s it! Just leave the tank filled with water for several hours. Leaving it full for a full day or two might be best.

If there are no leaks in your tank, start siphoning the water back out of the tank and down a drain. Don’t try to pick the tank up when its full because you risk cracking the tank. Remember, water weighs a lot! Once the water is out, you should have a clean, leak free tank that you can put on your tank stand!

If there is a leak in your new tank try to find where that leak is and bring it back to your LFS. If there is a leak in your older, used tank you will have to find the source of the leak and try to fix it before setting the tank up.

How’s your leak test going? Leave a comment below! For more tips sign up for our weekly updates and newsletter!

TJ

Comments { 0 }

Coral Nurseries Reviving more Reefs

Its always great to hear a story about how underwater coral nurseries, SCUBA divers, and the knowledge and techniques of the aquarium hobby are helping to revive the natural coral reefs out in our world’s oceans. When we hear about these stories, Aquarium Tip Tank will always share them.

Continue Reading →

Comments { 0 }

Tip of the Day | Cleaning your new Tank

This Aquarium Tip Tank aquarium tip of the day is all about cleaning your new tank out before use! Keep reading to learn about the easy, natural way to clean out your new tank for your aquarium. Personally, I would take these steps even if I bought a brand new tank from my local fish store (LFS). Cleaning your tank is a must if you acquired a used tank from a garage sale, or the one that’s been sitting in your attic for a year.

First, start by just rinsing your tank out. Using water that is Reverse Osmosis filtered and DE-ionized (RODI) is preferred, but not completely necessary for this process. If your tank is new from your LFS, then your cleaning is pretty much done. You’re just looking to get some of that dust and packaging material knocked off and out of your tank. You can let the inside of the tank air dry and wipe the outside down with a clean, soft cloth.

If your tank has been sitting in a dirty garage or attic collecting spider webs, paint chips, and sawdust for the last year (or more), you’ve got a little more cleaning to do. DO NOT USE ANY CHEMICAL CLEANERS! Just take a 1/4 cup or your normal white vinegar and dilute it with about 1/4 gallon of water (again RO/DI water is always preferred). Put that mixture in a new, rinsed spray bottle. That’s your cleaner. Get as much dust and dirt out of the tank by just rinsing it out with plain water first, then use your homemade cleaner and a clean, soft cloth to get the dirty grime off of all the surfaces and out of all of the nooks and crannies. Thoroughly rinse your tank out one last time and you’re done!

Make sure you do all of this in a location where you won’t scratch or crack your aquarium and where you won’t destroy your carpet or any other part of your home! When you’re done with the cleaning, it’s time for the leak test!

Want more? Get our weekly updates and newsletter by signing up for our email list! Just got done cleaning your new tank and have some insight? Leave a comment!

TJ

Comments { 0 }

Benefits of LED Aquarium Lighting

In this post we will share some aquarium tips and information about lighting your tank with LED lights, and share the benefits of using LED lighting for your aquarium. A few years ago the initial sticker shock of buying a new LED system for your aquarium lighting was just too much. There also weren’t LED systems available that could produce enough light for some species of coral and plants. Technology has advanced a little over the last several years, more companies have dove into the LED lighting realm, and supply and competition has lowered the price of the LED lighting system for your tank. So, lets look at some of the benefits of the LED lighting system for your aquarium.

Continue Reading →

Comments { 0 }

Aquarium of the Week Contest!

Start sending us emails at support@aquariumtiptank.com with the subject “Aquarium of the Week!” Include some pictures and a short description of an aquarium that you are submitting for the weekly contest. We will look through all of the submissions for the week – generally Monday evening through Sunday – and award an aquarium of the week every Monday! We will then report about the aquarium of the week via all of our media outlets, bringing a little beauty and enjoyment to all in the beginning of every week! We will not share your email addresses or contact information, but do not include any personal information in your emails and tank descriptions that you are not willing to share with all.

Now that the boring legal stuff is out of the way, send us some pictures and information about your beautiful aquarium! Also, sign up for our free weekly newsletter and e-updates to get the first look at every aquarium of the week winner, free aquarium tank tips,  and aquarium news.

Have another aquarium contests we should play? Leave a comment and let us know.

TJ


Comments { 0 }

Coral Basics

Here, we will provide the basic information about corals for the reef aquarium. It was once thought that keeping corals in an aquarium was impossible, but over the years, with advancement of technique and technology, it has become much easier to care for coral in your saltwater aquarium! We will start with the basics in this article and continue with several articles getting into the specific needs of each of the seven main categories of corals for the reef aquarium.  Join us, enjoy, and figure out which type of coral you’d like to keep in your beautiful home marine aquarium!

What are corals? Corals are actually animals! They may look like flowers and plants, but they are actually tiny creatures called polyps. These tiny polyps have tentacles that surround a mouth, digestive system, reproductive tract, and nervous system. The tentacles of each polyp are tipped with stinging cells called nematocysts that they use to defend themselves and capture food.

On a coral reef, the polyps are not everything that you see. In fact, depending on the time of day that you visit the reef, you may not see any of the polyps at all! All corals secrete at least some amount of calcium carbonate as their byproduct. Calcium carbonate is the hard, shell-like byproduct of stony corals (Scleractinia) such as elkhorn coral, brain coral, staghorn coral, table coral, etc. that make up the skeleton structure that forms most of the visible reef. (“Scleractinia,” 2012)
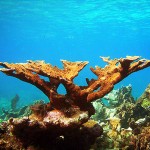
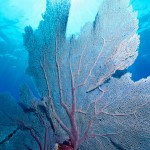
Soft corals (Gorgonacea) such as sea fans and sea whips have a flexible skeleton that is made of a protein secretion called gorgonin. They do secrete some calcium carbonate, but only in small clumps.  (“Gorgonian,” 2012) The polyps of these stony corals and soft corals generally live in colonies. The larger the colony of polyps, the larger the skeletal structure. Entire colonies can weigh several tons!
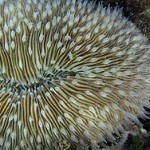
 

Mushroom corals (Corallimorpharia) are singular polyp corals that have a wide oral disc on top of a narrow column. The singular polyps of mushroom corals can occur together in large colonies, but they do not form hard, stony skeletons. (“Corallimorpharia,” 2012)


If corals are animals what do they eat? Where do they get their nutrients? The coral polyps extend their tentacles out of their skeletons and use their nematocysts to trap tiny plankton particles floating through the ocean. The polyps can also contract into their skeleton when they are stressed or to protect themselves from predators and the elements. You may not see the polyps if you visit the coral reef during the day because they extend themselves the most when they are feeding on the plankton at night. (“What are Coral Reefs,” 2012)

Most corals also contain a symbiotic algae called zooxanthellae. The zooxanthellae provide the coral polyps with the organic products of photosynthesis including glucose, glycerol, and amino acids while also providing oxygen and helping the coral remove wastes. The glucose, glycerol, and amino acids are used to manufacture proteins, fats, carbohydrates, and the calcium carbonate that helps build those skeletons. In return the coral supplies the algae with carbon dioxide, produced by coral respiration, and metabolic waste products such as nitrates and phosphates. These are the compounds and inorganic nutrients necessary for photosynthesis of the algae. The coral also provides the zooxanthellae with a protected environment. (“What are Coral Reefs,” 2012)

So, what are the types of corals that we can keep in our aquariums? All of them! However, the types of coral that are most frequently kept in aquariums are referred to as mushroom corals, soft corals, polyp corals, Large Polyp Stony (LPS) hard corals, and Small Polyp Stony (SPS) hard corals. Hydrocorals and Sea Fans can also be kept. We will go through the details of each of these types of corals in future posts!

What would you like to know about each type of coral? Leave a comment and sign up for our free e-updates and newsletter!

TJ

References

Corallimorpharia. 2012. Retrieved February 29, 2012, from http://en.wikipedia.org/wiki/Corallimorpharia

Gorgonian. 2012. Retrieved February 29, 2012, from http://en.wikipedia.org/wiki/Sea_fan

Scleractinia. 2012. Retrieved February 29, 2012, from http://en.wikipedia.org/wiki/Stony_coral

What are Coral Reefs. 2012. Retrieved February 29, 2012, from http://coris.noaa.gov/about/what_are


Comments { 1 }

Coral Rescue by the Aquarium Hobbyist

Marine scientists are going to start transplanting corals that have been grown in onshore aquarium nurseries to damaged reef off the shores of Fort Lauderdale. Ken Nedimyer, president of Coral Restoration Foundation, gives credit to aquarists for the ideas, techniques, and knowledge about growing and transplanting. These are just some of the pieces of news about how the aquarium hobbyist can help with the ocean and reef conservation efforts that we like to read here at aquarium tip tank.

Continue Reading →

Comments { 1 }
UA-29192030-1